
Shot Type
The Most Boring Shot in Your Catalog Is the One That Does the Selling
The packshot is your product, isolated on a clean background, lit evenly, with nothing else in frame. It's the shot Amazon requires, every marketplace expects, and every product page is built on. It is also where AI photography most often falls apart — because the packshot is a pure accuracy test. There is no scene to hide behind. If the cap is the wrong material, if the label text is mangled, if the proportions are off, the customer sees it instantly. Accuracy is non-negotiable here: an embellished packshot doesn't just look bad, it generates 'item not as pictured' refunds.
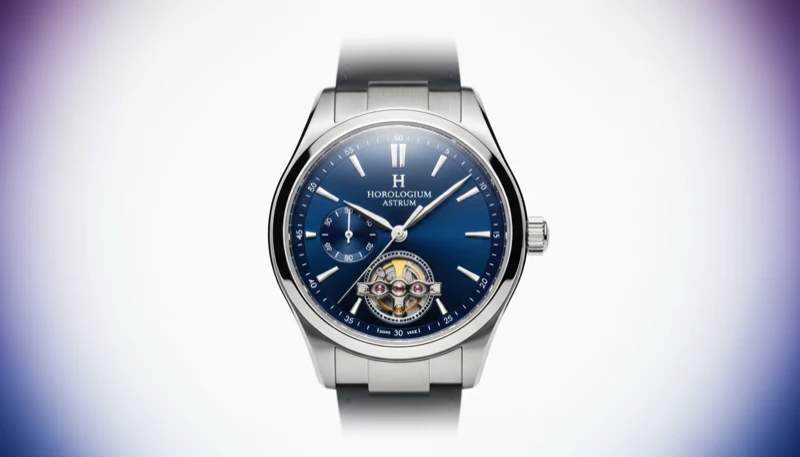
When to Use This Shot Type.
Marketplace primary images — Amazon requires pure white background (RGB 255,255,255) with the product filling about 85% of the frame, and Walmart and Google Shopping have similar rules
Product detail pages, where the packshot is the reference image shoppers zoom into before buying
Catalogs and wholesale line sheets where buyers need to evaluate the product with zero environmental distraction
Any time you need perfect consistency across a full product line — same angle, same lighting, same shadow on every SKU
How Dezygn Creates These.
In the Visual Syntax framework, the packshot is the shot where Subject does almost all the work. Style is fixed: clean catalog, high-key bright, white or pale neutral background. Action is none. Scene is a lighting decision, not a location. The camera recipe is fixed too: 85mm, f/8 to f/11, straight-on or a slight 3/4 angle — the 'sharp catalog' look where every detail is visible and nothing is hidden.
That leaves the Subject — and this is where Dezygn does it differently. Instead of describing your product and hoping, you attach the actual product photo and Awa recreates it in the new setup without guessing. The AI doesn't know what your product looks like; if you're vague, it will guess, and its guess won't match reality. A real source image anchors the shape, the materials, the label, the exact colors.
One rule from real client work that nobody tells you: lighting must match material. Matte products want broad soft light. But if your product is reflective — glasses, jewelry, metal, glass — you must use soft studio lighting with fill from multiple directions. Single-direction lighting creates dark sides that hide details. We learned this the hard way on client eyewear work.
Pro Tips.
01
Your source image decides your output quality
Garbage in, garbage out. A dark, blurry product photo won't magically become sharp in the output. Use a source at least 2,000px on the long edge, background removed, multiple angles if you have them. If text on the label is blurry when you zoom into the source, it will be worse in the generated image — the AI cannot add information that isn't there.
02
Set output resolution to match or exceed the source
A 2K source rendered at 1K output forces the pipeline to downscale, which blurs fine detail — brand text is always the first casualty. If your labels look consistently wrong, it's a resolution setting, not a prompt problem. Test compositions fast at 1K, then render final deliverables at 2K+.
03
Keep the contact shadow
A product floating on pure white with zero shadow reads as a bad Photoshop cutout. A soft, natural contact shadow grounds the product and makes it feel photographed rather than generated. For glossy surfaces, a subtle reflection adds even more realism. Once the packshot proves accuracy, the hero shot can add desire through lighting, isolation, and depth.
04
Shoot the whole line in one session
Marketplaces want 5-7 images per product, and a catalog needs identical lighting across every SKU. Define the setup once — lighting, angle, shadow depth — and apply it to the entire line in one batch. Consistency is what makes a catalog look professional, and it's the thing traditional shoots struggle to maintain across days.
05
Reflective product? Soft studio with fill — always
Chrome, glass, polished metal and acetate act like mirrors. Golden hour and single-source dramatic lighting create dark voids on reflective surfaces that hide the product's form. Use a three-point soft setup with fill so the light wraps around the product and every surface stays readable.
Create Packshot Photography with AI.
Generate professional packshot photography in minutes, not hours. Dezygn's AI understands composition, lighting, and brand consistency.
Start FreeRelated Shot Types.
Detail Close-Up Photography
The detail close-up fills the frame with one square inch of the product: the hinge, the stitching, the milling, the weave. Its job is proof. Anyone can claim 'premium materials' in copy; the macro shot is where the claim gets checked. For premium products this is the conversion shot — customers paying $300 for titanium frames or $200 for a leather bag want to inspect the thing they can't touch. It's also the shot that punishes lazy sourcing hardest, because at macro distance every hallucinated detail is visible.
Learn morePackaging Photography
Packaging shots make the box, jar, pouch or tube the subject — the printed object a customer receives. For premium brands the packaging IS part of the product, and unboxing is part of the purchase. This is the hardest accuracy test in AI photography because it's full of text, and text is where generation fails loudest: one mangled letter on a label and the image is unusable. The brands that get this right treat label fidelity as an engineering problem with known rules, not a lottery.
Learn moreScale Shot Photography
A scale shot communicates true size by placing the product against a universal reference — a hand, a face, a table, a doorway. It exists because photographs lie about size by default: a 30ml jar and a 100ml jar look identical on white. 'Smaller than expected' is one of the most common reasons for returns and 1-star reviews, and it's entirely preventable. This is the most literal expression of the accuracy principle: if the pendant is 2cm, it must look 2cm. If the texture is matte, it cannot be glossy. The image is a promise the physical product has to keep.
Learn more